How To Download High-Res Images From Frick Digital Collections (via Dezoomify)
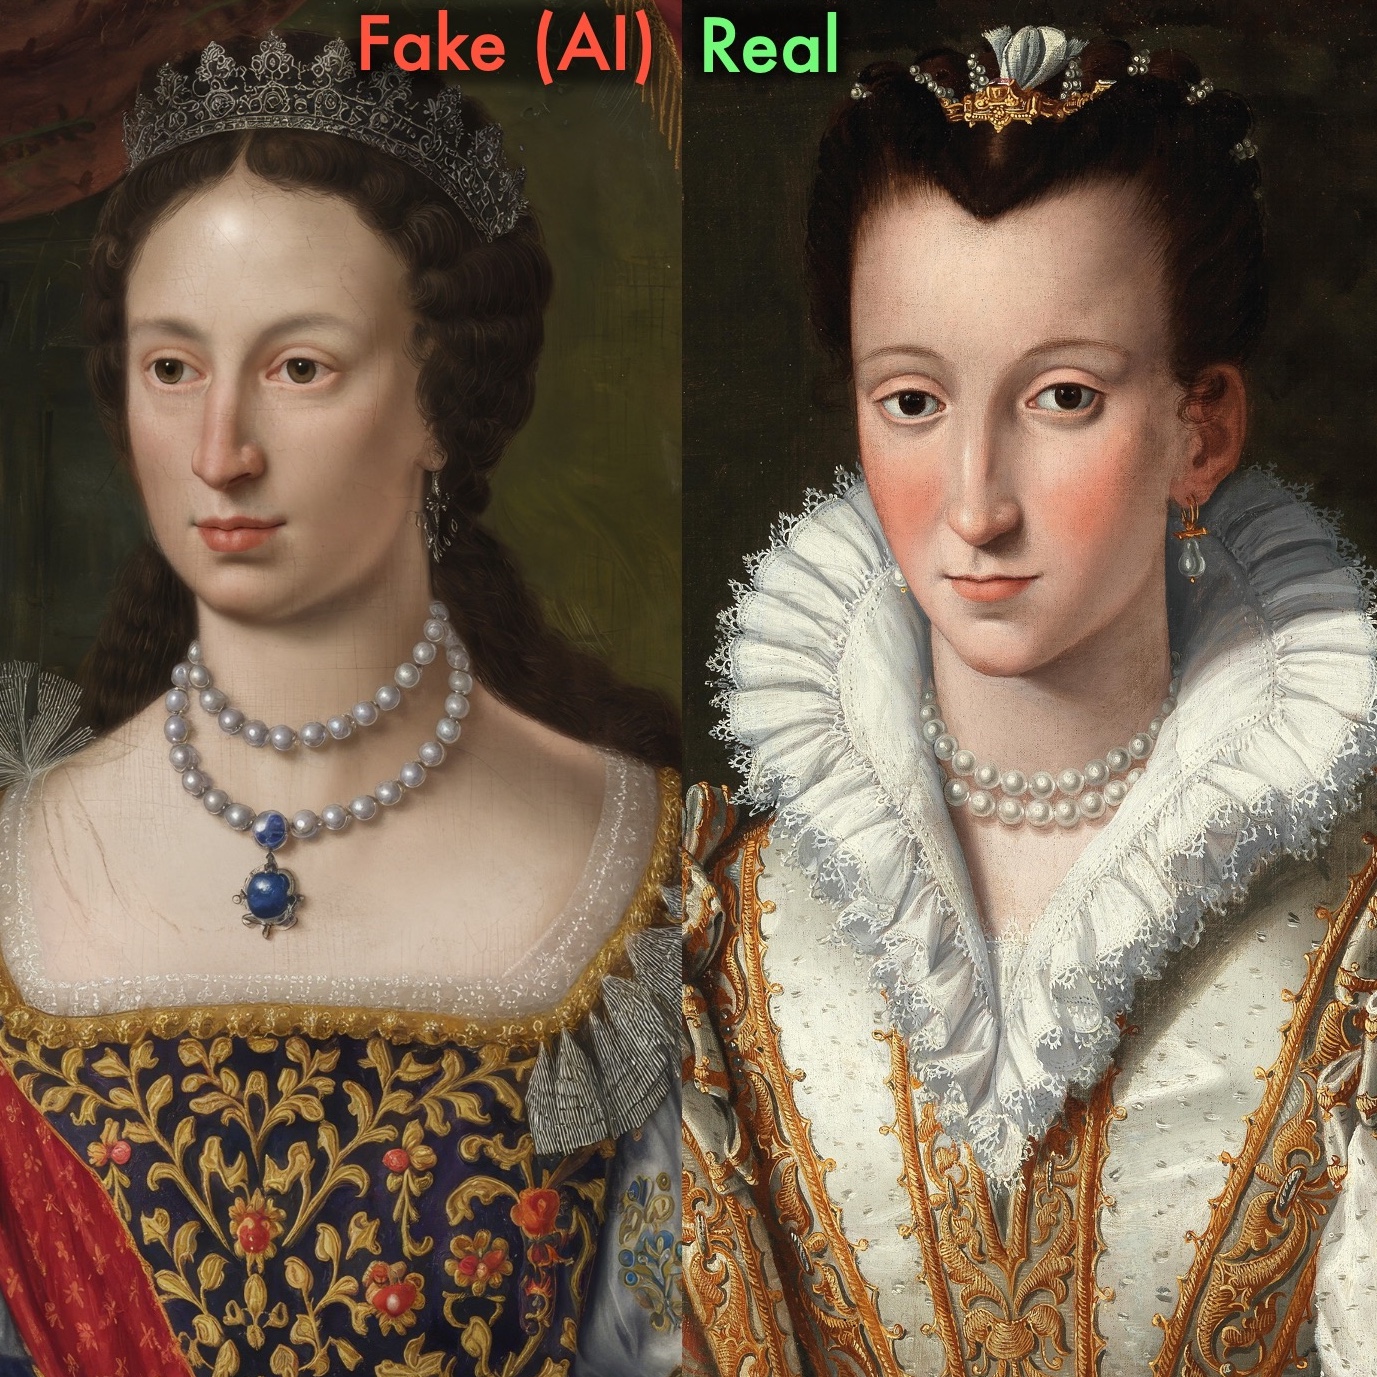
Today, I was preparing a “portrait of the day” post, and hoped to include a batch of five paintings, rediscovered together, that served as a fantastic comparison point. They were found on the Frick Digital Collections, a consistently phenomenal resource. However - despite Frick offering a “large” download size - I found that that the result had crushed these nice crisp images into a tiny low-quality photo! Here’s how to fix that.

Firstly, please do note, for 99% of images on Frick, the “large” size (2048px) will be more than sufficient to approximate the quality of the original scan. You don’t need to go to all this trouble. However, when it is necessary, this process will permit you to extract Frick images in maximum quality, just the same as the high-resolution online viewer.
- - -
THE EASY WAY
STEP 1: Familiarize yourself with the Dezoomify tool. For this task, we will only be using the website version. I do recommend the Firefox version of the browser add-on - it works exceptionally well - but for this process, we do not need it; just the site will suffice. http://dezoomify.ophir.dev/
STEP 2: Load your image on Frick. For this first example, we will be using the aforementioned group of five, the Varnum Family by E.W. Blake. https://digitalcollections.frick.org/digico/#/details/ContainerID/3107100204452/All
The page will, by default, show an array of thumbnails. You can mouse over “download JPEG,” beneath each image, and select the Large option: the resulting image is 1147x1536 and can be saved with ease.

However, when you click on any of those online thumbnails, the Frick online zoom viewer will pop up. From there, it becomes apparent, by comparing the downloaded file and the original, that the quality is not actually equivalent.


But never fear: there is a solution! Here goes.
Please note, from now on, I will specifically conduct this tutorial using Firefox - I find it slightly easier to navigate the “inspect” tool there, than in Chrome, although either can be used successfully. From now on, the steps of the tutorial are based on the Generic Dezoomer Tutorial for Dezoomify-rs, which is a more complex variation of the tool. (Many thanks to @lovasoa on github for developing this incredibly helpful utility.)
STEP 3: Right-click outside the viewer box, anywhere in the white space, and select “Inspect” from the menu that appears.

STEP 4: Select “Network” from the Inspect console that appears. Follow its prompt to Reload the page (click the button). Select your image again, when the page refreshes, and zoom in, as far as you can, within the Frick’s viewer.

STEP 5: You will see a disconcertingly long list of image pieces, all with the “imagesdigitalcollections” web address. Don’t worry about that. Click one, and copy the link of ONLY ONE of them. You really only need one.

Here is the one I copied:
https://imagesdigitalcollections.frick.org/media/dzi/516f459a1d588bc96468cab451562350_files/13/13_18.jpeg
Take note of that /13/ in the URL, right near the end. This is important - this is the highest, best quality zoom level that I was able to find. (12 is lower quality. 14 does not work at all.) For this to work as well as possible, please be sure you have the number 13 in your image URL; type it in to replace the number, if you need.
The /13_18.jpeg section, at the very end of the URL, refers to the X and Y coordinates of the image, i.e. the placement of that specific piece. Technically speaking, the images appear in small pieces, or "tiles," making a grid that assembles itself into a hi-res image. The Dezoomify tool takes those pieces and conveniently puts them back together into an entire single image. Here, for instance, is the small tile for the image that we copied.

STEP 6: Edit that URL, replacing “13” and “18” - or any of those 2 final numbers in the image URL you picked - with {{X}} and {{Y}} - those are the placeholders that let Dezoomify decipher the code and re-assemble the pieces. The result will look like this:
STEP 7: Now, go back to Dezoomify online and paste in the link you’ve just edited:

STEP 8: Patiently wait for the image to load! The larger it is, the longer it takes; it may be a few minutes.

STEP 9: Right click and save it.

It will, by default, save as “canvas.png” but you can write a specific filename of your choice, as I did here.

STEP 10: Behold the file! It will be staggeringly high-quality. The pixel resolution produced here is a magnificent 5632 x 7680. It is also somewhat oversized - 39.4 megabytes in PNG format. If you’re low on disk space, I recommend converting to JPG at this point with any tool of your choice (I won’t include that in this tutorial; many others have already covered the topic). If you do convert it, be sure to save at 100% quality to keep your image crisp and fresh.

As a JPG, it is now a more convenient 6.5 megabytes. Feel free to leave it as a PNG, though, if you have the disk space for it.

STEP 11: Open your image and compare to the zoomed-in copy on Frick online. You will find it is exactly the same level of high quality!

Congratulations! Your task is finished. Enjoy the image. This will work on anything from the Frick site.
But, let’s try it again, just to be sure. This time, I’m going to use a Sturtevant Hamblin painting, the signed "Portrait of Ellen," for which I did not previously have a high-res image.
The Frick image tile link I’ve extracted, using all of the above tutorial steps, is this: https://imagesdigitalcollections.frick.org/media/dzi/0798dbbb6ecd781eb9910f0648d50d7d_files/12/6_5.jpeg
Let’s edit it into the format that Dezoomify can use, with /13/ and {{X}}_{{Y}.jpeg: https://imagesdigitalcollections.frick.org/media/dzi/0798dbbb6ecd781eb9910f0648d50d7d_files/13/{{X}}_{{Y}}.jpeg
Lo and behold, there she is! Here is her updated wiki entry: https://americanfolkportraits.org/wiki/HAM.SOT.01202007.63 And here is the remarkable difference in image quality between my previous image and the new one we’ve just extracted.


I hope this is helpful! Let me know if you have any comments or questions. For almost all use cases, the browser version of Dezoomify should suffice. Good luck and happy image hunting!
- - -
BONUS: THE HARD WAY (for tech enthusiasts)
This one is arguably worth doing for perfectionists, as it produces a more perfect image without any visible seams whatsoever. (On the image produced by Dezoomify online, you can see very small white borders runnng across and downward from the upper left corner.) However, it is generally tedious, and I would recommend against bothering with it in most cases. Still, I'll include instructions.
Step 1: Install dezoomify-rs. This involves a somewhat complicated knowledge of command-line systems. To be completely truthful, I may have forgotten exactly how to install it. I did it a few months ago; I recall it being a bit tedious, and requiring an up-to-date computer, so if your machine is on the older side, I’m afraid you may be out of luck. (I have a Mac running OS Tahoe 26.1 and it worked just fine, but it failed on my old Mac running Big Sur 11.7.10. Make of that what you will - the technical limits, my update-phobia, or both.)
Step 2: Once it is installed, open a command prompt. In my case, having a Mac, this is Terminal. Type “dezoomify-rs” and hit Enter to load the tool.
Step 3: Once it’s loaded, simply paste your URL of choice. For instance, here’s the one we prepared just now for the Hamblin painting. Then, hit Enter to start the process. https://imagesdigitalcollections.frick.org/media/dzi/0798dbbb6ecd781eb9910f0648d50d7d_files/13/{{X}}_{{Y}}.jpeg
Fair warning, it will look a little bit strange. I promise it’s working:

Step 4: Enjoy your slightly better image. It will be called “dezoomified.png” and is a larger filesize than the browser version, and has none of the white seams (note the line running through the handwritten script at the top). However, most people won’t spot that seam at all, so if the command line is daunting, don’t worry about it and just use the easy way.


Comments
Post a Comment